Do you want to learn how to protect your manicure against chipping too? With these simple steps in mind, there’s no excuse not to have stunningly polished hands anytime you like—even if salons aren’t open yet. Follow these expert-approved tips and master the art of nail care like a true beauty master.
Table of Contents
Supplies Needed
You’ve come to the right place! I’m here to share my knowledge and show you what it takes for flawlessly polished fingers. In this article, I’ll walk you through 10 steps to achieve a perfect DIY manicure. So grab your nail file and favorite polish color, and let’s start!
Getting a professional-looking mani without spending money or time in a salon is possible with these easy tips. You can also get your nails at home Dubai.
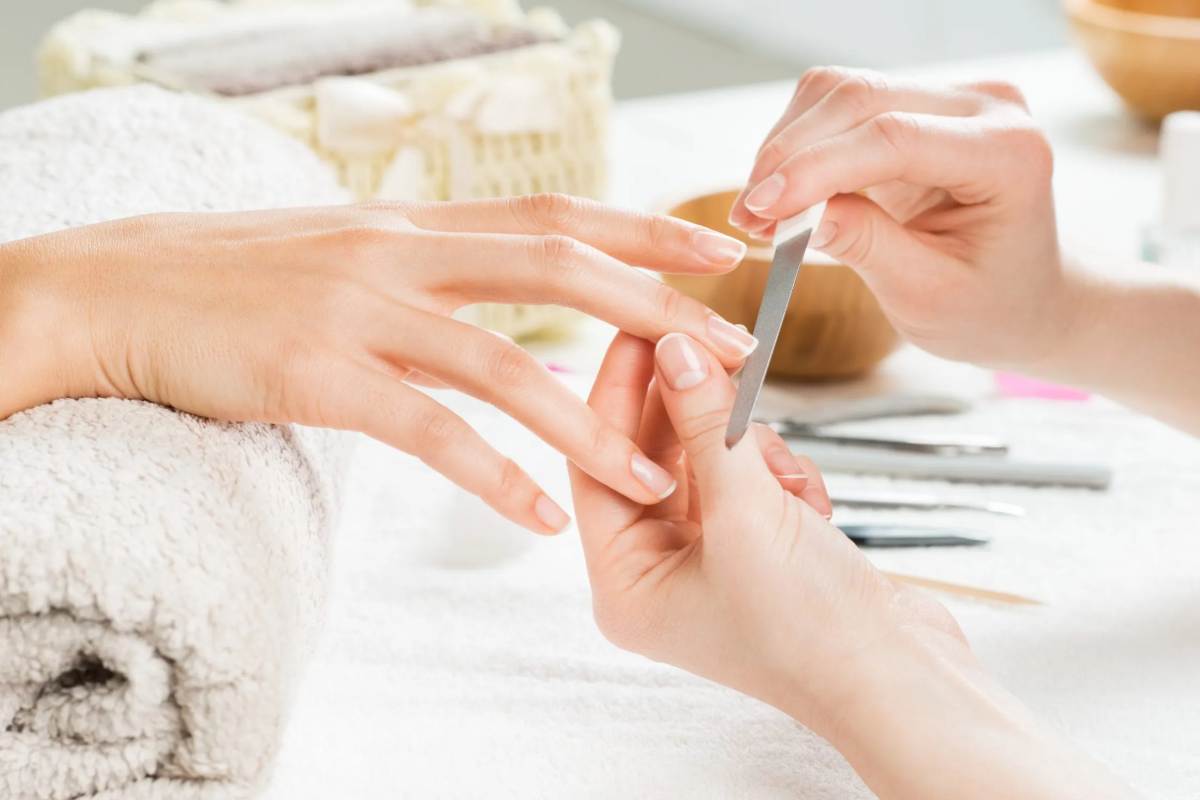
First and foremost, start by trimming and filing your nails into whatever shape suits you best. Then, whether oval, square, or round, ensure they’re evenly shaped so each nail gets equal attention later.
Next is preparing your cuticles; use cuticle oil or cream and gently push them back using an orange stick or cuticle pusher. This step helps keep your nails clean for polishing and allows for easier growth over time.
Finally, when everything else has been taken care of, comes the fun part: painting those piggies! Carefully apply two coats of polish to each fingernail, allowing them to dry completely between layers. Once both layers are finished, don’t forget the all-important top coat; not only does it ensure a long-lasting shine, but it also protects
More Info on Supplies Needed
Did you know that the average woman spends up to $1,500 yearly on manicures? If that’s not in your budget, don’t worry! You can have perfect nails without stepping foot in a salon. All you need are the right supplies for an at-home manicure.
Start with a nail file and buffer block to get your nails looking smooth and even. Then use cuticle cream or oil to soften the cuticles before pushing them back gently. Choose any color of nail polish you like and apply two coats, waiting several minutes between each coat. Once dry, finish with one layer of top coat for added shine and protection from chips and cracks.
These essentials are needed for DIY manicures: a file, cuticle cream or oil, nail polish, top coat, and buffer block. Make sure they’re stocked in your home manicure kit! Then, we’ll be ready to start prepping our nails with these five items in tow.
Preparing the Nails
Now that you have gathered all the necessary supplies, it’s time to prepare your nails for a perfect DIY manicure.
Once you are happy with the overall shape of your nails, it’s time to trim the cuticles. Use caution here so as not to over-trim them or cause irritation.
After this step, gently buff each nail to create a smooth canvas for polish application. This will also help remove ridges from the surface of each nail if any are present.
Finally, sanitize your hands and nails properly with an antiseptic solution before applying the base coat—an essential step towards achieving a flawless at-home mani!
Applying Base Coat
Applying a perfect base coat is essential for achieving the ideal at-home manicure! It’s like laying down a strong foundation to build your masterpiece. Taking the time and effort to do it right sets you up for success in painting your nails, so let’s dive into some tips and tricks for applying the base coat with expertise.
The first step of any successful base coat application is to remove all dirt and debris from your nails; otherwise, the polish won’t adhere properly. To ensure everything is clean, use an acetone-free nail lacquer remover or rubbing alcohol to wipe each finger before beginning.
This will also help rid your hands of natural oils, which could prevent the polish from sticking. Afterward, clip and shape your nails as desired; if using cuticle trimmers, be careful not to overcut them.
To apply the base coat itself, start by shaking the bottle vigorously, then brush it onto each nail in one even stroke, starting at the center and going outward toward the sides—this helps avoid air bubbles forming under the color later on.
Additionally, try pressing firmly against the tip of each nail when brushing it on; this ensures that every nook and cranny gets nicely coated since it’s easier for varnish to slip around curved areas than stick to them. Once finished, let dry completely before painting your pretty piggies!
Now we’re ready to add our favorite shade of hue!
Painting the Nails
Nail painting is an essential part of the perfect at-home manicure. From selecting the right polish to correctly brushing on color, it’s important to get this step right! Here are a few tips for achieving flawless nails:
- Polish Selection: The best nail polish is key to a great manicure experience! Choose polishes that are known for their long-lasting wear or chip-resistant formulas. Also, select colors you’re comfortable with so your mani looks its best after application.
- Nail Shaping – To ensure clean lines and uniform edges, use your preferred method (filing or clipping) before applying polish to shape your nails. This will help create a polished look when you apply color later.
- Painting Technique: When it comes time to paint, use one thin layer of polish across each nail and ensure not to overload the brush with excess product, which can lead to clumping and uneven coverage. Then lightly brush on a second coat of color if desired, taking care not to overwork the formula to achieve an even finish and prevent cracking down the road.
When all the steps have been completed, you’ll be ready for some finishing touches!
Finishing Touches
Did you know that about 15% of the population annually spends money on nail art? If you’re looking to give yourself a perfect DIY at-home manicure, then don’t forget the finishing touches! To make your designs sparkle and shine, glitter or rhinestones are excellent choices. You can also use other nail decorations, such as studs, wraps, and peel-off stickers.
For those who love to create intricate nail art designs, get creative with colored polish, striping tape, and stamps. After creating your beautiful design, it’s time to seal in all your hard work by applying a top coat. This will protect your nails from chipping while adding extra glossiness and vibrancy. A good quality topcoat is essential for ensuring your DIY manicure lasts more than one day!
After completing the main part of your manicure, ensure everything stays put and protected by using a clear base coat before each application. This will help prevent discoloration and keep your nails looking fabulous for longer. Now that you have finished the finishing touches step, let’s move on to sealing and protecting this amazing look!
Sealing And Protecting The Manicure
Sealing and protecting your at-home manicure is the key to making it last. To ensure your nails look fresh, use a top coat after every layer of polish. This will lock in color pigments and keep your DIY home manicure from chipping or cracking prematurely. When applying the top coat, start from the cuticle line and brush toward the tip of the nail for an even distribution.
It’s important to let each layer dry before you start on another one; this could take up to 10 minutes, depending on how thickly you applied it. If you’re short on time, invest in a quick-drying top coat, which can help speed up this process. You should also ensure your nails are completely dry before starting activities such as washing dishes or cleaning surfaces.
When sealing off with a clear topcoat, add extra layers around the edges of your nails, where they often touch other objects. This will give them added protection against wear and tear over time to keep your home manicure looking perfect! Finally, for best results, apply two thin coats rather than one thick one so all areas get their protective sealant layer. With these steps, you’ll be ready for some simple aftercare tips to maintain beautiful nails!
Aftercare Tips
Once your DIY at-home manicure is complete, properly caring for your nails and cuticles is essential. Aftercare for a manicure is just as important as applying polish itself! To ensure your freshly painted nails look their best for longer, here are some aftercare tips that all nail enthusiasts should follow.
Take Sarah, a self-proclaimed ‘nail enthusiast” who recently tried her hand at an at-home mani. She followed each step diligently but was unsure how to finish the look with proper aftercare techniques.
After studying the subject, she learned that one must always remember to remove old polish before reapplication and moisturize nails by regularly massaging oil or cream into their cuticles. This simple yet effective technique helps prevent dryness and splitting while maintaining shiny, healthy-looking nails.
When removing polish, never pull or pick at the edges; use a non-acetone-based remover wrapped around cotton pads for gentle removal without causing unnecessary damage. Lastly, don’t forget about filing! Properly shaped nails will make any mani pop even more, so be sure to file them down with a quality buffer once every week or two, depending on preference and lifestyle.
These easy steps can help maintain beautiful hands and prevent chips from appearing too soon, allowing you to enjoy your flawless new manicure much longer!
Conclusion
After giving yourself a DIY at-home manicure, following a few aftercare tips is important to ensure your fabulous mani lasts as long as possible. Remember, makeup less is more, and the same rule applies to nail care. Moisturize regularly with lotion or cuticle oil, and be careful when washing dishes or doing other activities that could damage your nails.
When removing old polish, use an acetone-free remover and begin by soaking cotton balls instead of scraping them directly onto the nail beds. These simple steps help you enjoy beautiful nails for longer and think like a beauty master.